Log homes should be examined and re-stained every 3 to 5 years to maintain optimal conditions, including checking gutters for obstructions so water doesn’t splash back onto logs.
Additionally, ensure gutters remain clear so as to not cause overflow onto logs during rainfall events.
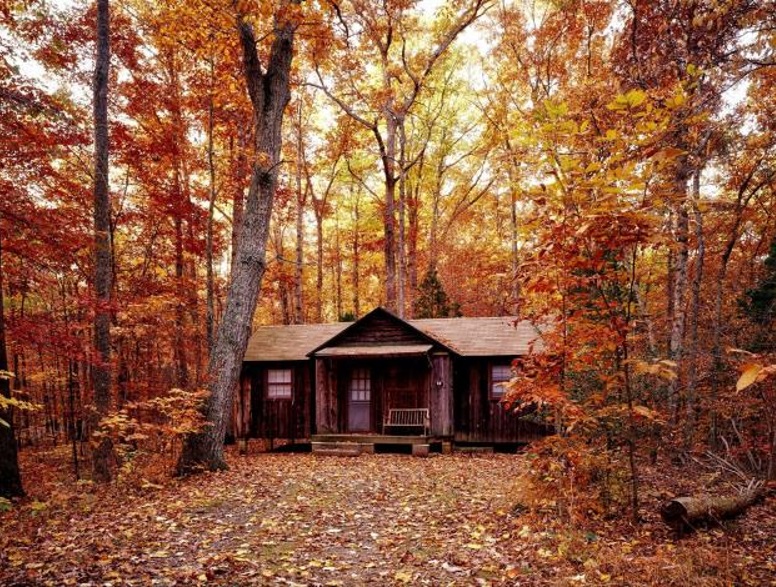
How to Inspect Your Log Cabin
Inspection of your log cabin regularly can prevent a minor problem from turning into a more costly replacement issue over time. By keeping it clean, re-stained and chinked it will look its best for generations to come.
While experts strongly suggest you avoid using a pressure washer on your log home (particularly around chinking), a brush and garden hose water will work just fine for most cleaning needs.
Scrubbing wood surfaces with mild soap and bleach solutions is another good way of getting them clean, particularly if there’s been lots of grime or mold build-up – just make sure that afterward, they’re rinsed off using another hose to complete this step!
As your log cabin settles, it is natural for cracks (known as checks) in the wood to appear. While this may be considered positive, if these checks are exposed to rain, snow or dirt they must be sealed to protect their integrity from rain, snow and dirt infiltration.
Larger checks should be filled using caulking made with expanding insulating foam sealant that remains flexible during normal expansion and contraction of logs without affecting its bond.
Moisture damage to log homes’ fascias is another frequent occurrence, often due to roof run-off, dirt and debris build-up, algae or mildew growth and even rainwater leakage from rain gutters. Left untreated, this moisture damage may lead to costly replacements as rot sets in.
After inspecting your log cabin, you’ll know more about the treatments your home may require. You can visit this site to learn more about routine maintenance.
Weathering
Log homes are subject to the elements and require annual maintenance in order to remain structurally sound and look their best.
This requires regular visual inspections and periodic repairs as water penetration can cause wood rot, mildew and mold growth which in turn necessitate professional restoration like the kind offered from Superior Log Restorations in order to preserve its integrity while quickly responding to any structural issues that arise. This can help prevent further issues down the line.
Step one of any restoration project should always involve stripping away existing finishes and cleaning the logs, whether using chemical strippers or a pressure washer.
After sanding, logs must be cleaned to prepare them for staining. Caulking and chinking must be used properly to seal gaps between logs to protect against moisture seepage that could warp and twist their shape as well as invite insects in through gaps between logs if they’re left unsealed.
Regular inspection by an expert caulking and sealing company would ensure proper sealing around your log home exterior is in place and any issues detected promptly dealt with.
Stains
Staining is an integral step in the restoration process. It protects logs from rain, snow and UV rays that could otherwise lead to rot and mold growth while simultaneously discouraging insects from entering your log cabin.
As a rule of thumb, log homes typically need to be stained every four to seven years depending on factors like climate and sunlight exposure. A water hose spray test can help determine if now is the time to stain your log home. You can click the link: https://www.thehistoryreader.com/the-making-of-home-secrets-of-log-cabin-history/ to learn more about these structures.
A fresh coat of stain can dramatically transform the appearance and feel of your log cabin.
When selecting a stain for log homes that works well with caulking and chinking systems, select one specifically formulated to provide even color coverage with transparent properties to show off natural wood graining.
Log cabins require specific stain types. A paraffin oil-based stain is the optimal choice, as it penetrates deeply into the logs without leaving an oily film behind and won’t feed mildew or fungus growth.
Chinking
Log cabin chinking seals gaps and holes between logs of a home to protect it from moisture, insects and wind damage while helping lower heating and cooling costs. Chinking also adds aesthetic beauty by offering different textures and colors that complement or contrast with one another for a cohesive appearance.
To ensure successful chinking, logs must first be clean and free from dirt, using either a light cleaner or non-power washer to achieve this effect.
Logs should then be heated between 40 – 80 degrees F for the chinking to adhere; additionally they must remain dry. Too hot may evaporate its water-rich mixture while too cold will tighten their pores and hinder adhesion of chinking to logs.
Before applying chinking, it must first be pushed into position using a backer rod. This allows it to adhere properly with log movement while remaining flexible enough for any flexures that might occur. Furthermore, for hard to reach places it may be beneficial to utilize tools with long handles.
Ancient chinking consisted of a mixture of clay, lime, silt, sand and ash; this would often pull away from logs due to its poor elastic quality. Today’s modern alternative features an acrylic elastic compound that adheres to logs while stretching with them as needed.
Professionals understand how to combine modern techniques with historical preservation in order to restore your log cabin to its original look and feel while upholding structural integrity, so it is best to hire a professional company to carry out this work for you; undertaking it alone could have unwanted consequences and compromise the integrity of your cabin.


